
How to create and assign a task
Create a task to track a piece of work at your store, set its details, and assign it to a team member who is notified when the task lands on them.
Before you start
- Where: Store-level — the Tasks list lives in a store, not in the corporate view.
- Permission: Create Tasks to create; the Assign Tasks permission to set or change an assignee; the Edit Tasks permission to change other fields.
- Available by default to: Owners, Store Managers, Shift Leads, and Wash Attendants. (On custom roles, this needs the permission named above.)
- You must have: A store selected. Team members must already be added to the store to assign work to them, and equipment must be registered to link it.
Create a task
- On the Tasks list, select New Task (top right), the + button on mobile, or the floating + button. The task editor opens.
- At the top of the editor, choose the type chip — General, Repair, or Customer. New tasks default to General.
- Select the title field (What needs to be done?) and type the task title.
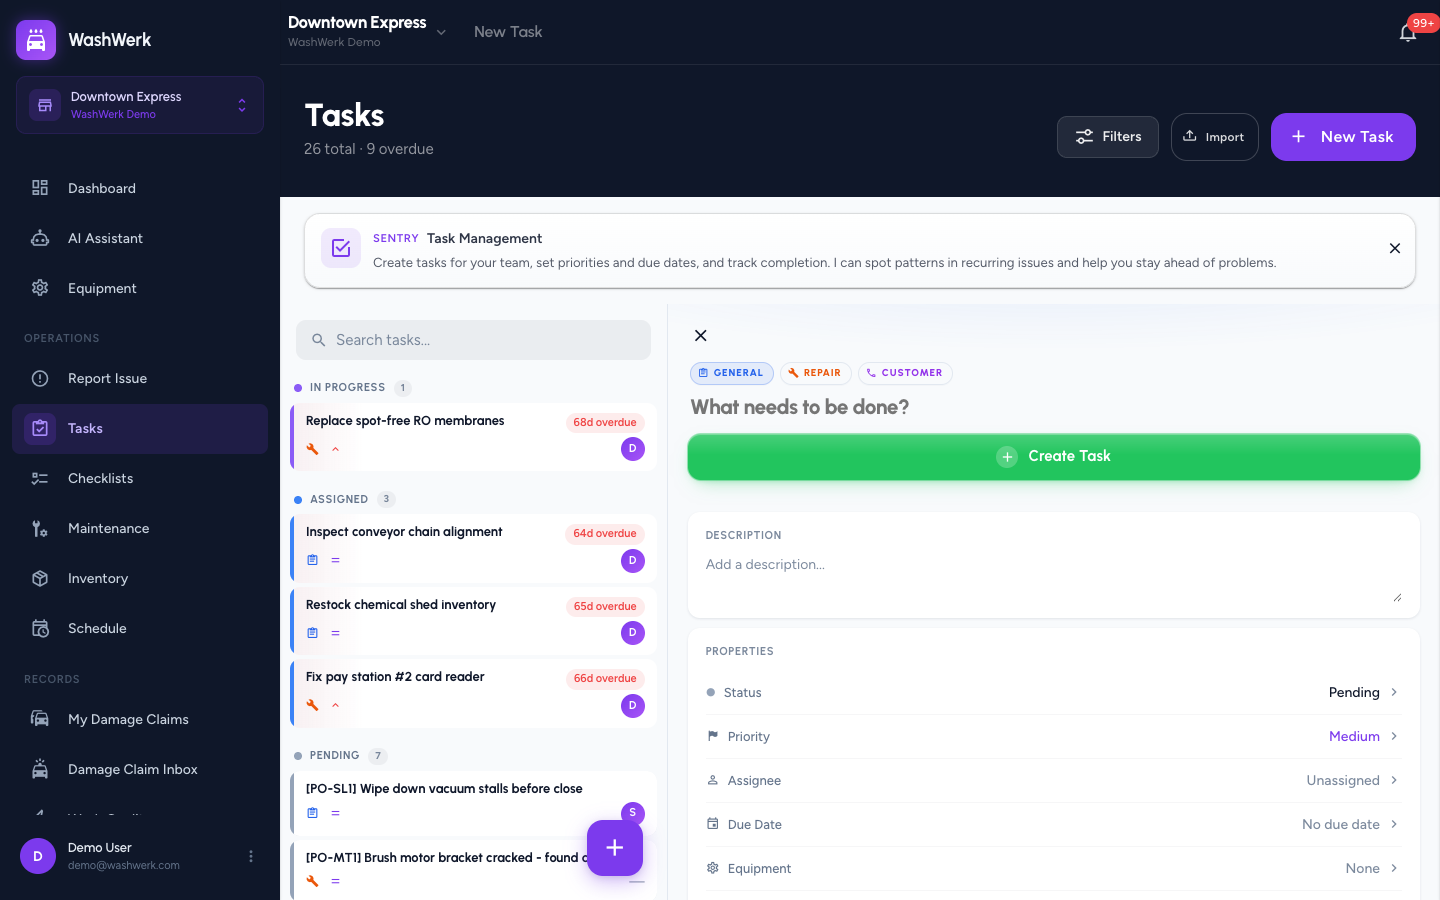
- Select Create Task. The task is saved and opens in detail view, ready for the rest of its details.
TIP
You can fill in priority, assignee, due date, and other properties before or after selecting Create Task — the task is editable as soon as it exists.
Create a repair task from the Report hub
A repair raised from the Report hub opens the same editor with the type already set to Repair.
- Open the store Report hub.
- Select Equipment / Maintenance Issue. The task editor opens pre-typed as Repair.
- Add the title and any details, then select Create Task.
Edit task details
After a task exists, edit its details directly in the detail view. Each change saves on its own.
- Edit the title: Select the title at the top of the detail view, change the text, then select away (or press Enter). The new title saves.
- Edit the description: In the Description card, select the field, type your text, then select away. The description saves.
- Change priority: In the Properties card, select Priority, then choose None, Low, Medium, or High.
- Assign or reassign: Select Assignee, search the team list, and select a person. To remove the assignee, select Unassigned. The assigned person is notified.
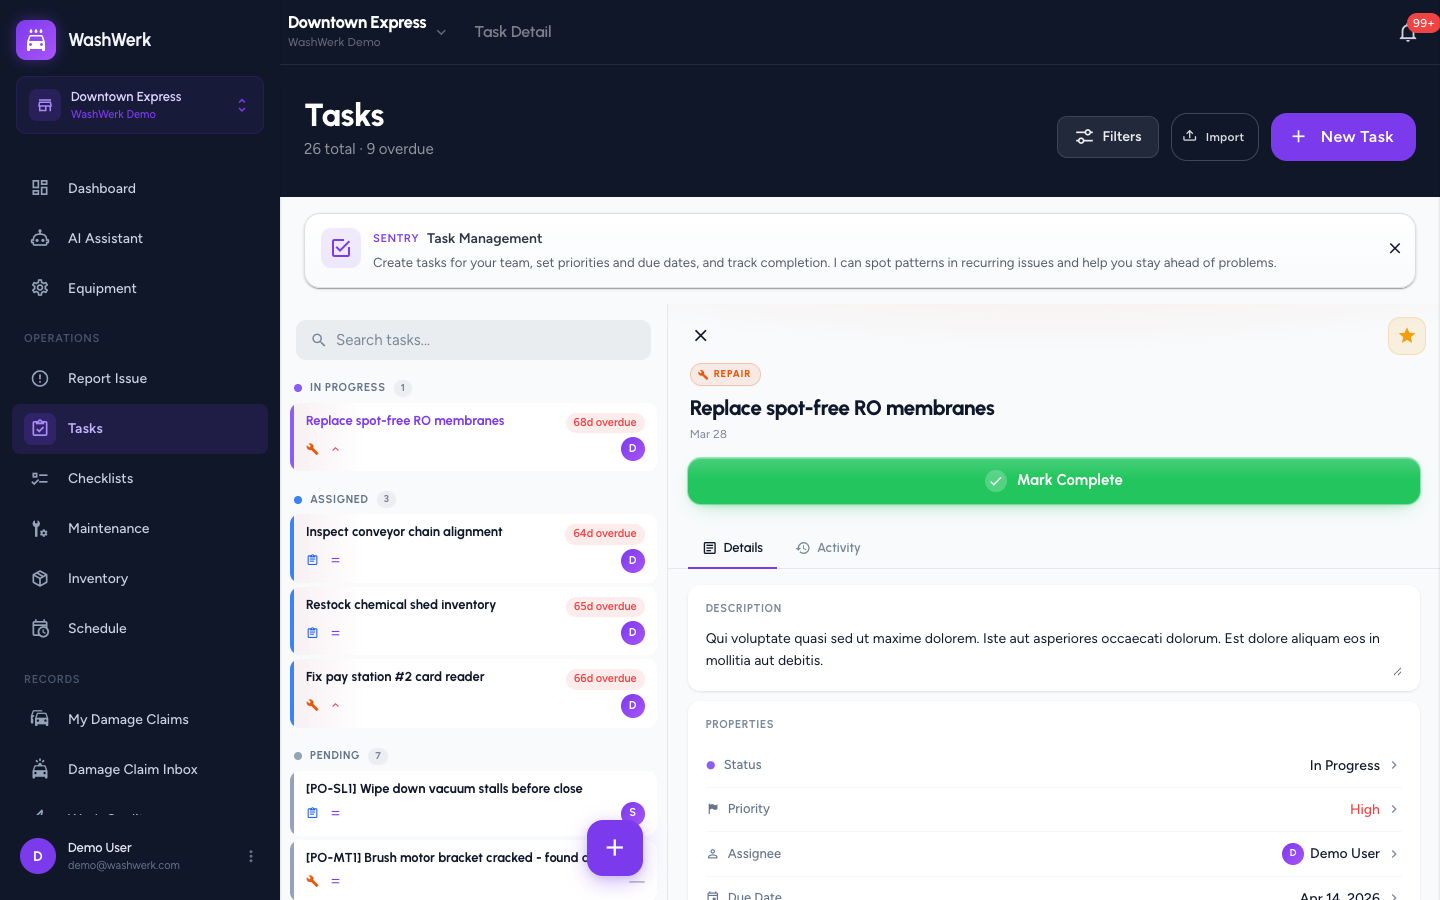
- Set or change a due date: Select Due Date, then pick a day from the calendar. To remove it, select Clear due date.
- Link equipment: Select Equipment, search, and choose the unit. Select None to unlink.
- Set estimated time: In the Time row, enter the number of minutes you expect the task to take.
Expected result
The task appears in the Tasks list under its status section, showing its title, type, priority, due date, and the assignee's initial. The assigned team member receives a notification.
Troubleshooting
- If you don't see a New Task button: Your role doesn't include the Create Tasks permission — ask an owner or manager to grant it, or check you're in a store (the corporate Tasks view is read-only, so you can't create tasks there).
- If a person isn't in the Assignee list: They aren't a member of this store yet. Add them to the store team first.
- If equipment is missing from the Equipment picker: Register the equipment at this store, then reopen the picker.