
How to create and edit custom roles
Build roles with exactly the permissions you want, beyond WashWerk's defaults, so each person gets only the access their job requires. This is for owners who need finer-grained access control than the built-in roles provide.
When to use this
Reach for this when the five built-in roles don't fit — you need to grant or withhold a specific permission that the defaults bundle differently.
Before you start
- Where: Corporate admin — the Role Builder page in the corporate area
- Permission: Manage Roles (held by the Owner role)
- Available by default to: Owners. (On custom roles, this needs the permission named above.)
- You must know: Custom roles are a company-wide setting. Decide whether each role is for the company context (corporate access) or the store context (per-store access) before you create it — context can't be changed after the role exists.
Switch the permissions mode
The full Role Builder unlocks in Advanced mode. Simple mode keeps the five built-in roles only.
- In the corporate sidebar, open Settings.
- In the Permissions section, select Advanced Mode. The mode saves immediately and a Manage Roles button appears.
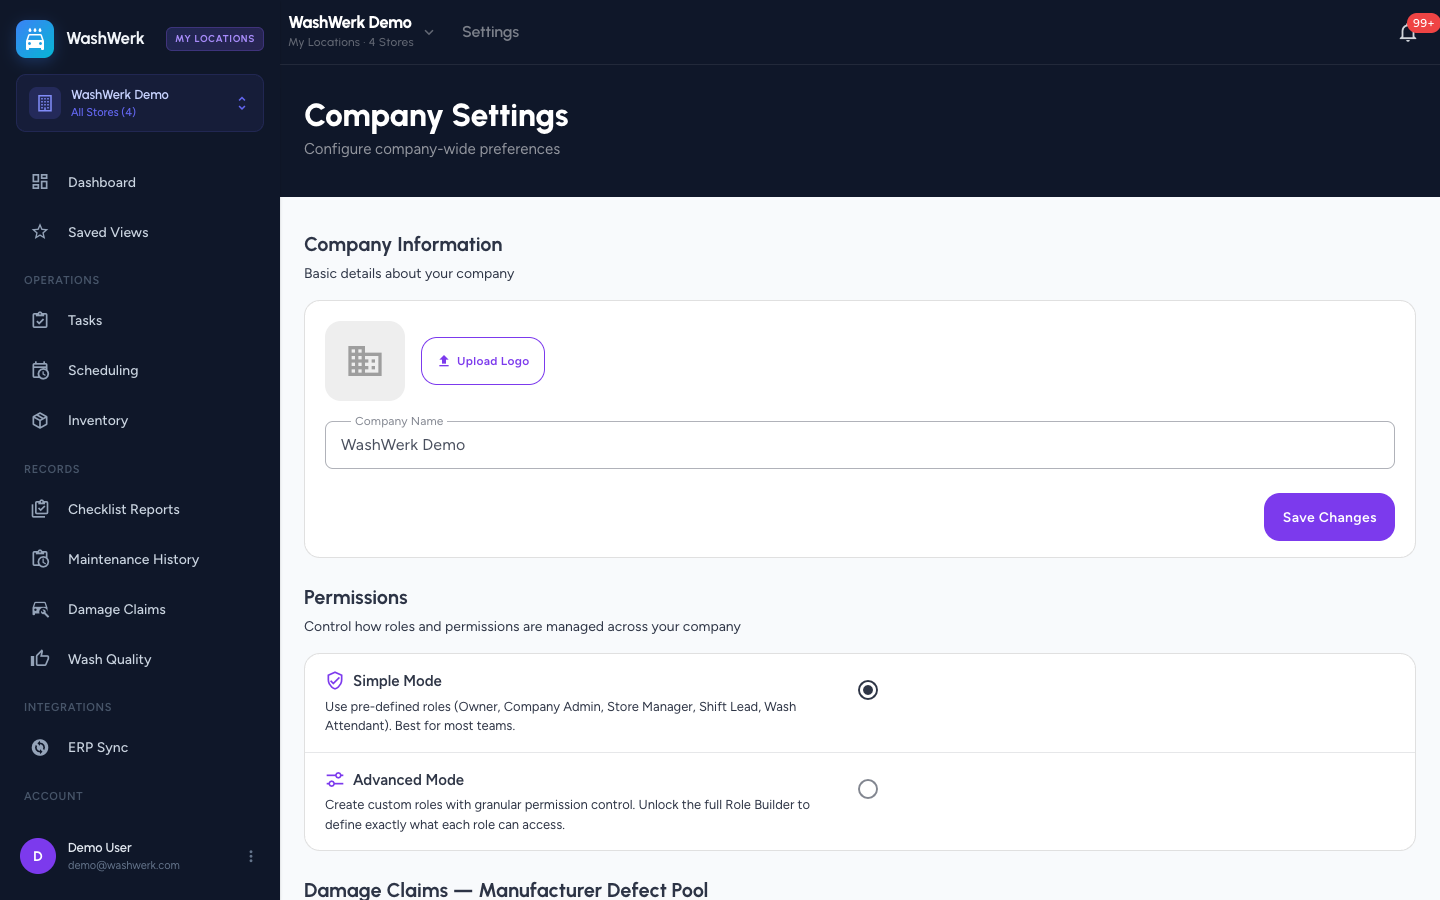
- To return to the defaults later, select Simple Mode in the same section.
Open the Role Builder
You can reach the Role Builder from several places once you have the permission:
- From corporate Settings, select Manage Roles (shown in Advanced mode).
- From the Company Team or store Team page, select Manage Roles in the page header.
Create a custom role
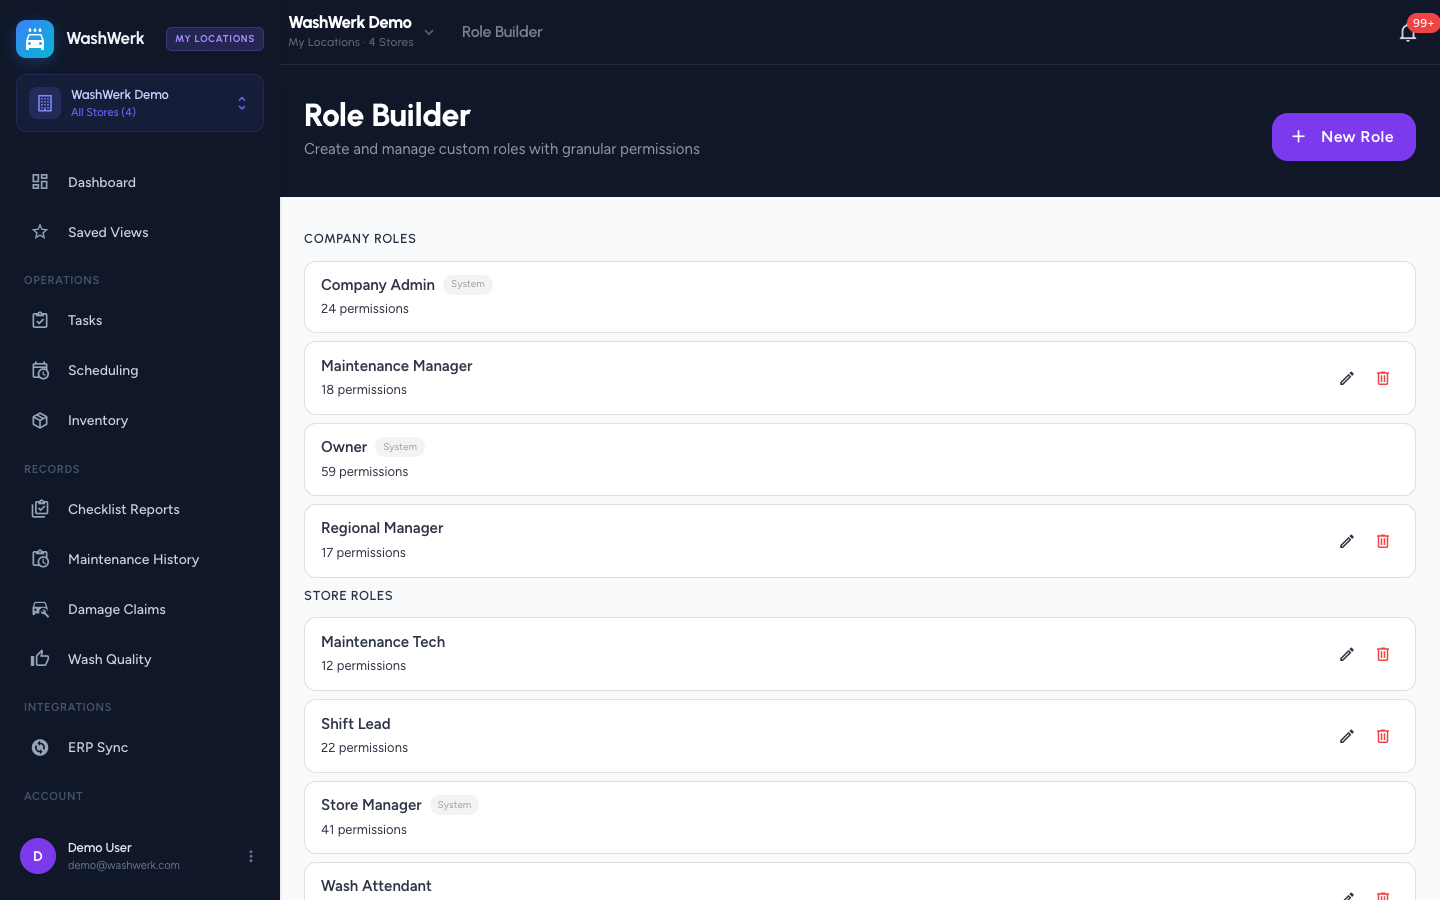
- On the Role Builder page, select New Role. The Create Role dialog opens.
- Enter a Role name.
- Choose a Context — Company for corporate roles or Store for per-store roles. The permission list updates to match.
- Select the permission checkboxes the role should have. Permissions are grouped by feature (Tasks, Inventory, and so on) to make them easier to scan.
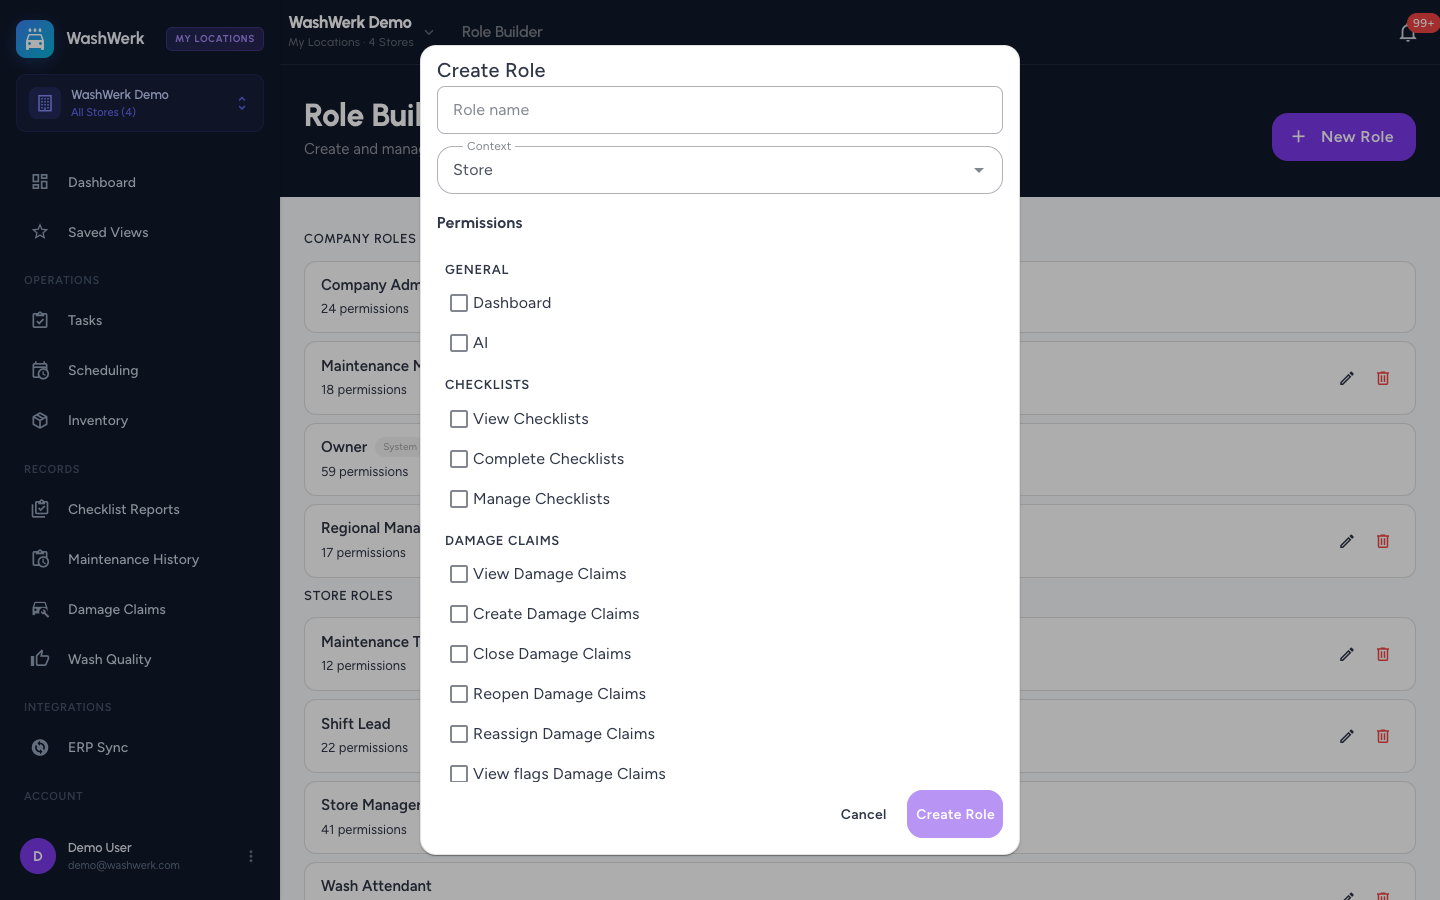
- Select Create Role. The new role appears under Company Roles or Store Roles and becomes assignable on the Team pages.
Edit a custom role
- On the Role Builder page, select the pencil icon next to the role. The Edit Role dialog opens.
- Change the Role name and adjust the permission checkboxes as needed. (The context can't be changed when editing.)
- Select Save Changes. Members already assigned to the role get the updated permissions.
Delete a custom role
- On the Role Builder page, select the trash icon next to the role. A confirmation dialog opens.
- Select Delete. The role is removed, and any members who had it lose its permissions.
Expected result
Your custom role appears in the matching Company Roles or Store Roles section of the Role Builder with its permission count, and it can be assigned to members from the Company Team and store Team pages.
Troubleshooting
- If there's no Manage Roles button or New Role option: Your role doesn't include the Manage Roles permission — only the Owner has it by default. The built-in roles also can't be edited or deleted; only custom roles show pencil and trash icons.
- If Create Role stays disabled: A role needs both a name and at least one permission selected before it can be saved.
- If a custom store role doesn't appear when assigning members: Confirm you created it in the Store context — company-context roles only appear on the Company Team page.