
How to build and publish the weekly schedule
Build your store's week of shifts in the schedule grid, then publish the draft so staff can see their hours. Draft shifts stay hidden from non-managers until you publish.
Before you start
- Where: Store-level — open your store, then Scheduling.
- Permission: Manage Scheduling. With only the View Scheduling permission, you see published shifts but cannot create, edit, or publish them.
- Available by default to: Owners and Store Managers. (On custom roles, this needs the permission named above.)
- You must have: at least one team member at the store and at least one active position. Without positions, the Bulk Add button is disabled and new shifts have nothing to assign. See Set up positions and staffing requirements.
View the schedule and move between weeks
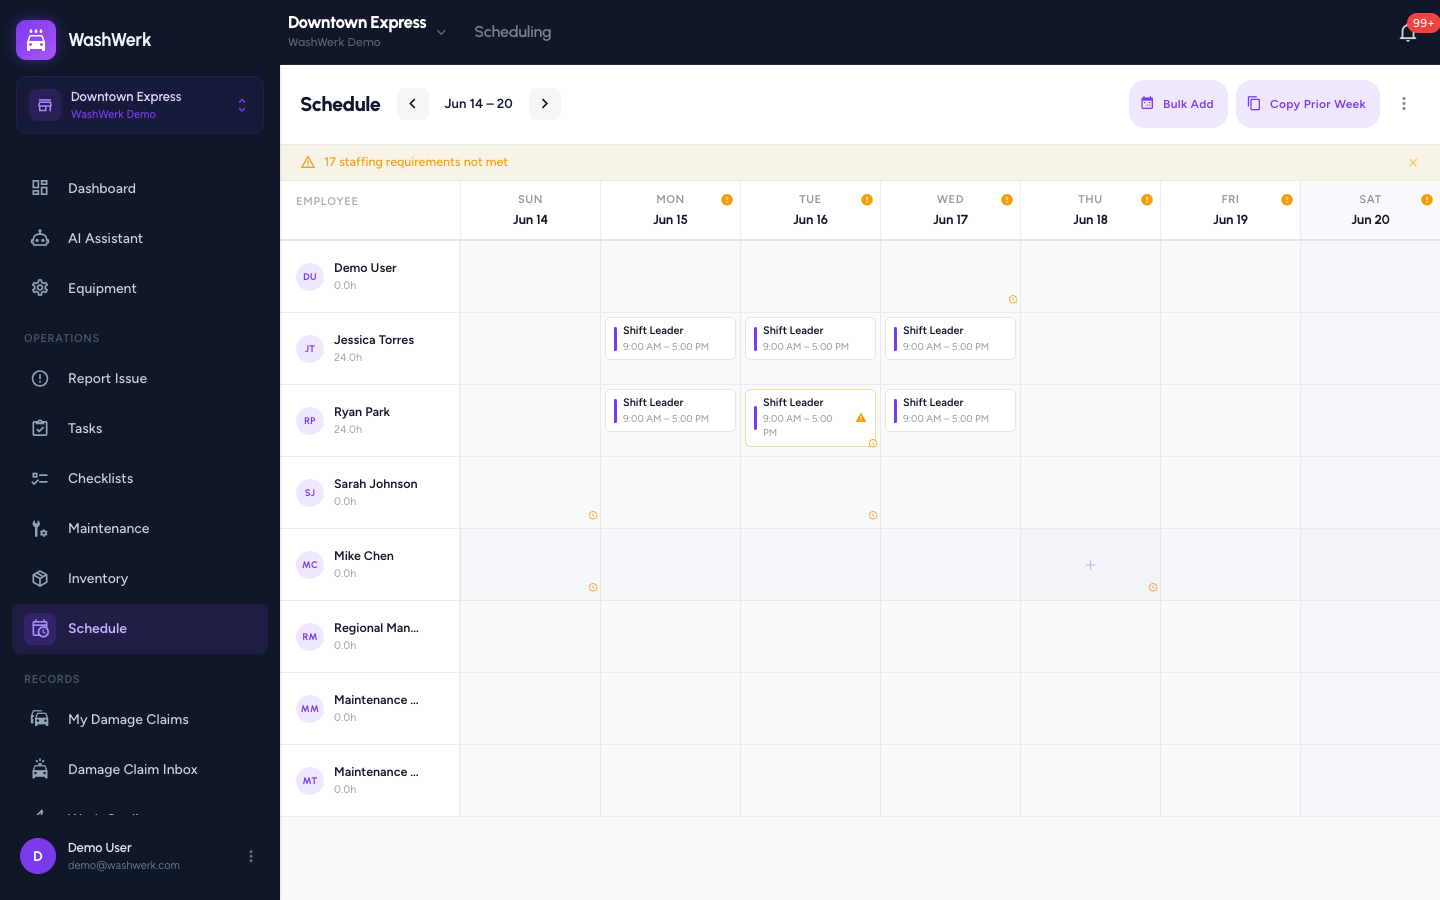
The grid lists each team member down the side and the seven days of the week across the top. Unpublished (draft) shifts are shown with a dashed/faded style; published shifts are solid.
- Open your store and select Scheduling. The current week's grid loads.
- Select the left or right chevron beside the week label to move to the previous or next week.
- Select the week label itself to jump back to the current week.
Create, edit, and delete a single shift
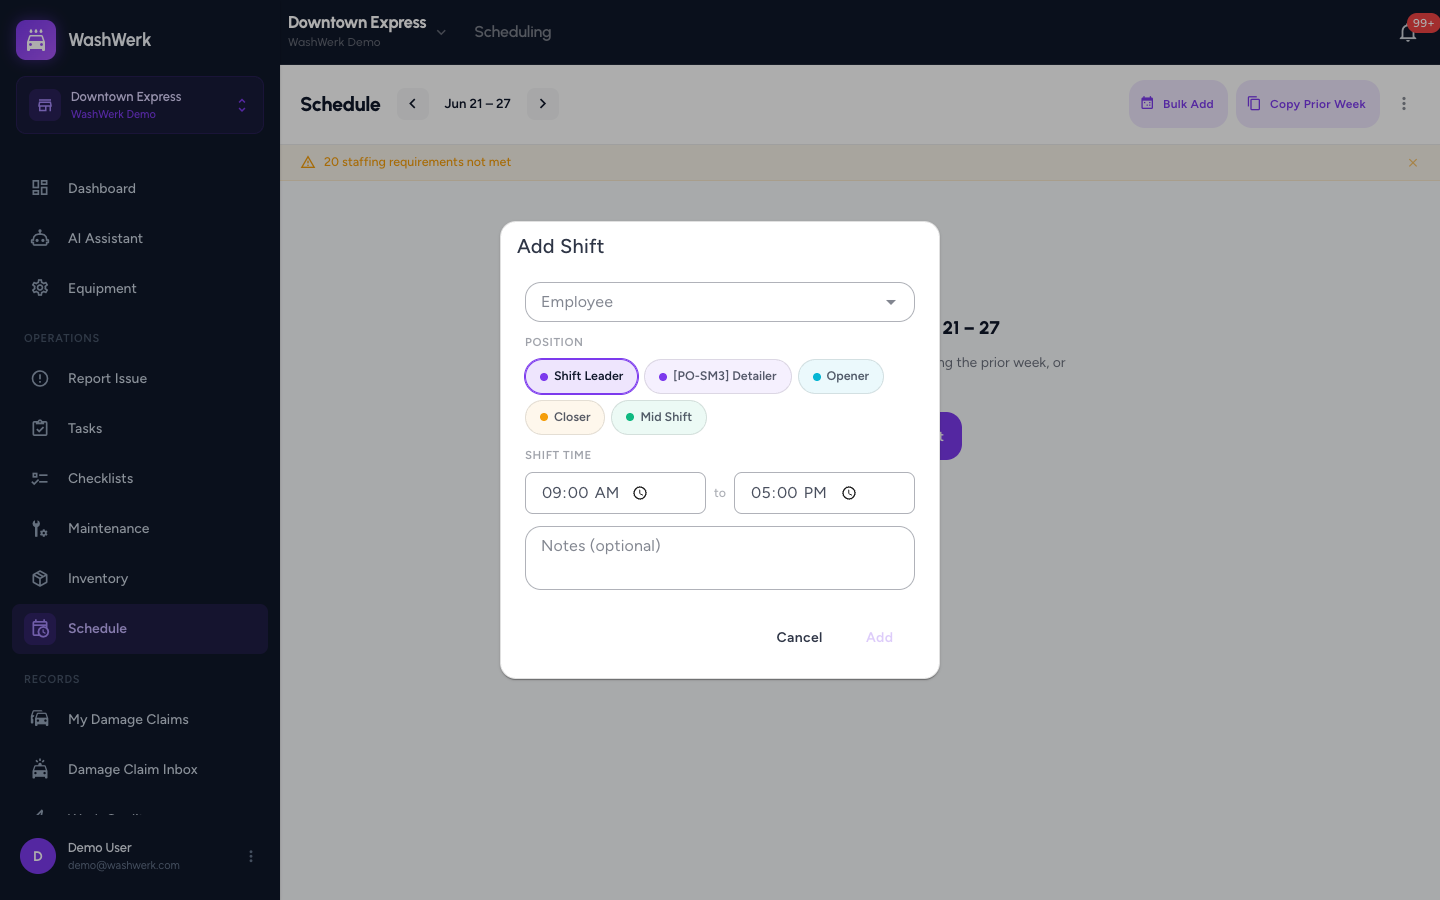
- In an employee's row, select the empty day cell where the shift belongs. The Add Shift dialog opens for that person and date.
- Select a Position. Only positions the employee is qualified for appear; the start and end time pre-fill from that position's staffing window when one exists.
- Adjust the Shift Time start and end fields, and add Notes if needed.
- Select Add. The shift appears in the cell as an unpublished draft.
To change a shift, select it to reopen the dialog, edit the position, time, or notes, then select Save. To remove it, select the shift and choose Delete in the dialog.
Move a shift by dragging
- Drag a shift to a different day or a different employee's row and release. The shift updates in place.
WashWerk blocks two moves: dropping onto a day where the target employee has approved time off, and reassigning a shift to an employee not qualified for its position. In either case the move is refused and a message explains why.
Bulk-add shifts across employees and days
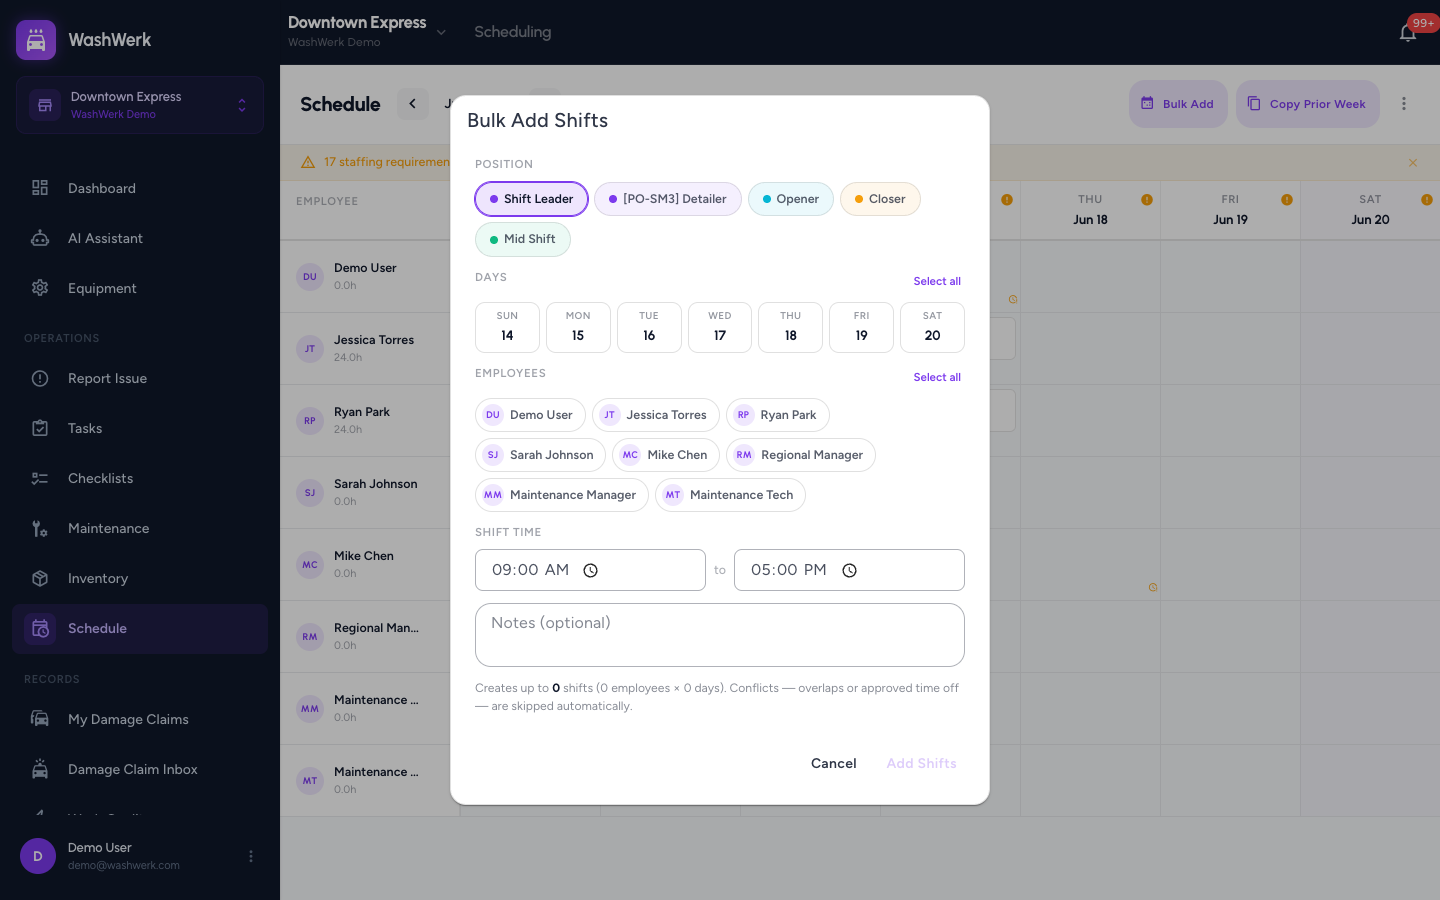
Use Bulk Add to drop the same position and time onto many people and days at once — for example, four attendants across Monday through Friday.
- In the toolbar, select Bulk Add.
- Select a Position, then select the Days and Employees to include. Use Select all to toggle a whole row.
- Set the Shift Time, add optional Notes, then select Add Shifts.
The summary line shows how many shifts will be created. Cells that conflict — an existing overlap or approved time off — are skipped automatically and reported back.
Copy the prior week
- In the toolbar, select Copy Prior Week.
- If the current week already has shifts, choose how to apply the copy:
- Merge keeps this week's shifts and adds the prior week's on top; overlapping shifts are skipped.
- Replace clears this week first, then copies the prior week over.
If the week is empty, the prior week is copied immediately with no prompt. A summary reports how many shifts were copied, cleared, or skipped.
Set an employee's unavailable times
Availability windows mark times an employee should not be scheduled. You can still schedule over them, but you will see a warning on the shift.
- In the employee's name cell at the left of the grid, select their name (look for the clock-edit icon).
- For each day, select Add to create a window, then set its start and end time. Each window means the person is unavailable during that range.
- Remove a window with its close (×) button, then select Save.
A clock-alert icon on a day cell flags days with unavailable windows; a warning icon on a shift means it overlaps one.
Publish the draft
- In the toolbar, select Publish. The count in the button is the number of unpublished shifts in the week.
- Review the pre-publish summary. It lists any unmet staffing gaps and any shifts that fall in an employee's unavailable time.
- Select Publish (or Publish anyway if gaps remain). Published shifts switch to the solid style and become visible to staff.
To pull a week back into draft, open the toolbar overflow menu (three dots) and select Unpublish All.
Dismiss the staffing-requirements warning banner
- When the week does not meet your staffing requirements, a banner appears below the toolbar reading "N staffing requirements not met." Select its close (×) button to dismiss it for the current week.
The banner is informational — dismissing it does not change any shift, and it reappears when you switch weeks or reload.
Expected result
The week shows solid, published shifts for each scheduled employee, the Publish button no longer shows a draft count, and team members who only have the View Scheduling permission can now see their hours for that week.
Troubleshooting
- If a shift won't save and shows a warning: the time overlaps another shift for that employee, or the employee has approved time off that day. Adjust the time or pick a different day.
- If an employee has no positions in the Add Shift dialog: they aren't qualified for any active position. Select Assign Positions to add them on the Positions page.
- If the Bulk Add button is disabled: the store has no active positions or no team members yet. Add positions or team members first.
- If staff say they can't see the schedule: the week is still in draft. Select Publish — non-managers only see published shifts.