
How to set up positions and staffing requirements
Positions are the roles people fill on a shift (such as Tunnel Loader or Cashier). Owners and store managers qualify employees for each position and set the minimum number of people needed per position, day, and time — the one-time setup that lets the schedule builder warn you about coverage gaps.
Before you start
- Where: Store-level — open your store, then Scheduling.
- Permission: Manage Scheduling.
- Available by default to: Owners and Store Managers. (On custom roles, this needs the permission named above.)
- You must have: your team members added to the store before you can qualify them for positions. See Add an employee.
Create a position
- On the Scheduling page, open the toolbar overflow menu (three dots) and select Manage Positions.
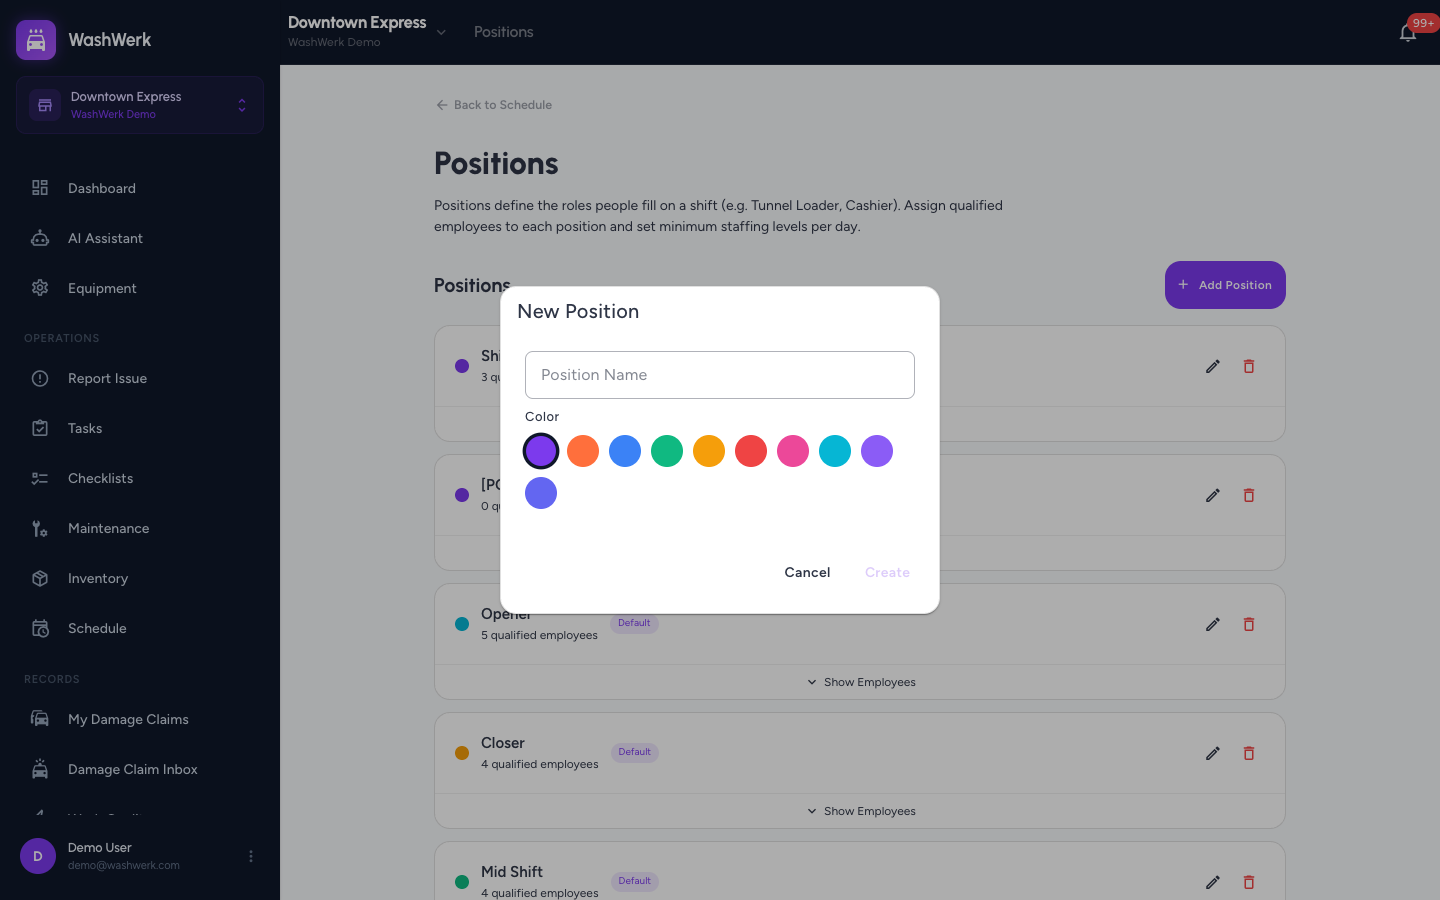
- On the Positions page, select Add Position.
- Enter a Position Name (for example, Tunnel Loader), pick a Color, then select Create.
Edit or deactivate a position
- On a position card, select the pencil (edit) icon.
- Change the Position Name or Color. To stop scheduling against it without deleting its history, turn off the Active switch.
- Select Save. Inactive positions show an "Inactive" badge and no longer appear when adding shifts.
Delete a position
- On a position card, select the delete (trash) icon.
The delete icon is disabled while any shift uses the position. Reassign or remove those shifts first, or deactivate the position instead to keep its records.
Qualify employees for a position
Only qualified employees can be assigned to a position when building the schedule.
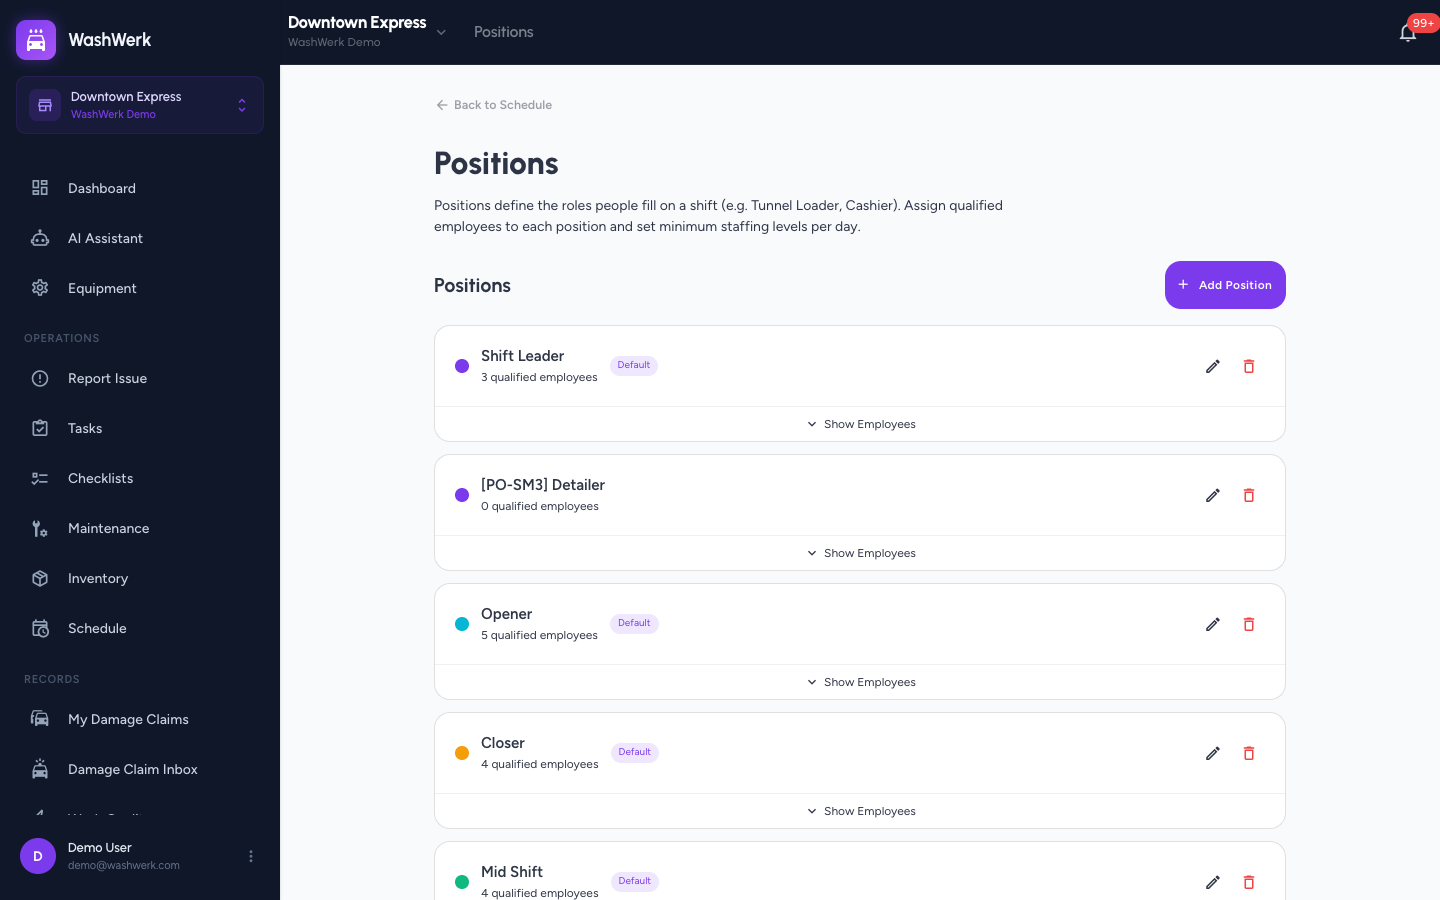
- On a position card, select Show Employees to expand it.
- Select Add Employee, then search for and select a team member. They appear as a chip on the card.
- To remove someone, select the × on their chip.
Reorder positions
- Positions sort by their saved order across the schedule. Adjust the order on the Positions page so the roles you schedule most appear first.
Create a staffing requirement
A requirement sets the minimum headcount for one position on chosen days and a time window. The schedule builder warns you when fewer people are scheduled than required.
- On the Scheduling page, open the toolbar overflow menu (three dots) and select Staffing Requirements.
- Select Add Requirement.
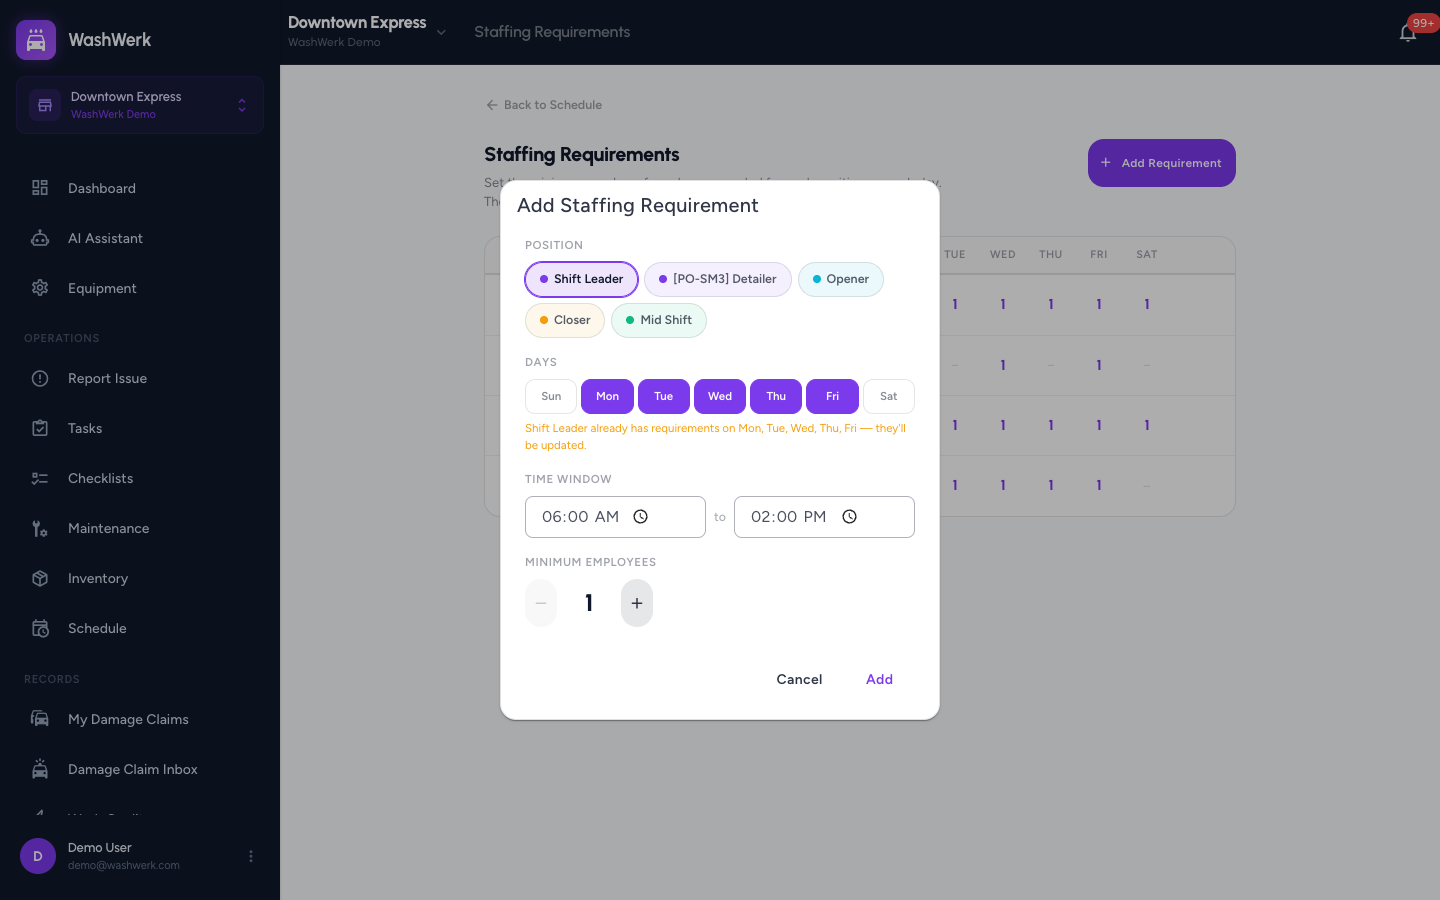
- Select a Position, then select the Days the rule applies to.
- Set the Time Window start and end, set Minimum Employees with the − / + counter, then select Add.
The page shows a matrix of positions (rows) and days (columns), with the required count in each filled cell.
Adjust a minimum count inline
- In the matrix, hover a filled cell and select − or + to lower or raise that day's minimum. The change saves immediately. The minimum cannot go below 1.
Edit or delete a requirement
- On a position row, select the pencil (edit) icon to change the position's days, time window, or minimum count, then select Save. Deselecting a day in the dialog removes that day's requirement.
- To clear all of a position's requirements, select the delete (trash) icon on its row.
Expected result
Your positions appear on the schedule with qualified employees attached, and the staffing matrix shows a minimum count in each position-and-day cell you configured. When the weekly schedule falls short, the builder flags the gap.
Troubleshooting
- If the Add Requirement button is disabled: the store has no positions yet. Create a position first, then return to Staffing Requirements.
- If an employee can't be assigned a shift for a position: they aren't qualified for it. Open Positions, expand the position, and add them under Add Employee.
- If a position's delete icon is greyed out: a shift still uses it. Remove those shifts or deactivate the position instead.