
How to configure your damage claim process
Tune how your store handles damage claims: how fast a manager must respond, which payment methods the intake form offers, the disclaimers a manager can cite when closing, and the scenario tags that power analytics. You can copy the core settings to your other locations in one step. This is for owners and managers who configure the process.
Before you start
- Where: Store-level (web).
- Permission: The Configure Damage Claims permission.
- Available by default to: Owners and Company Admins. (On custom roles, this needs the permission named above.)
- You must have: at least one store. To copy settings, you must have a second store in the same company.
Open the settings
- From the damage claims inbox, select Settings, or open Settings → Damage Claims from the store sidebar.
Set the response SLA
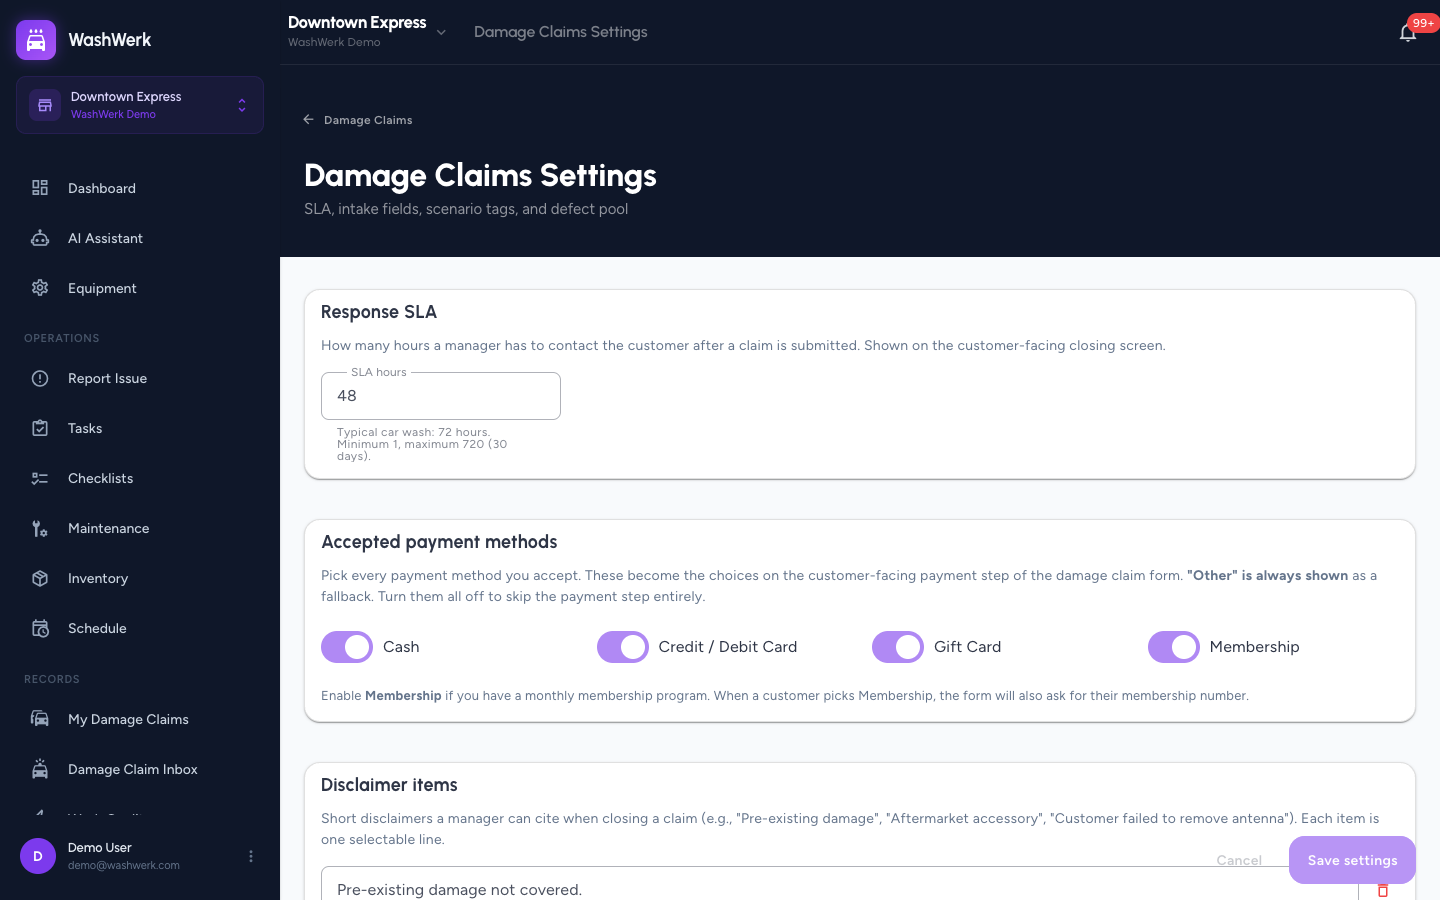
- Under Response SLA, set SLA hours — how long a manager has to contact the customer after a claim is submitted. This value is shown to the customer on the closing screen.
- The minimum is 1 hour and the maximum is 720 (30 days); a typical car wash uses 72.
Choose accepted payment methods
- Under Accepted payment methods, switch on every method you accept: Cash, Credit / Debit Card, Gift Card, or Membership.
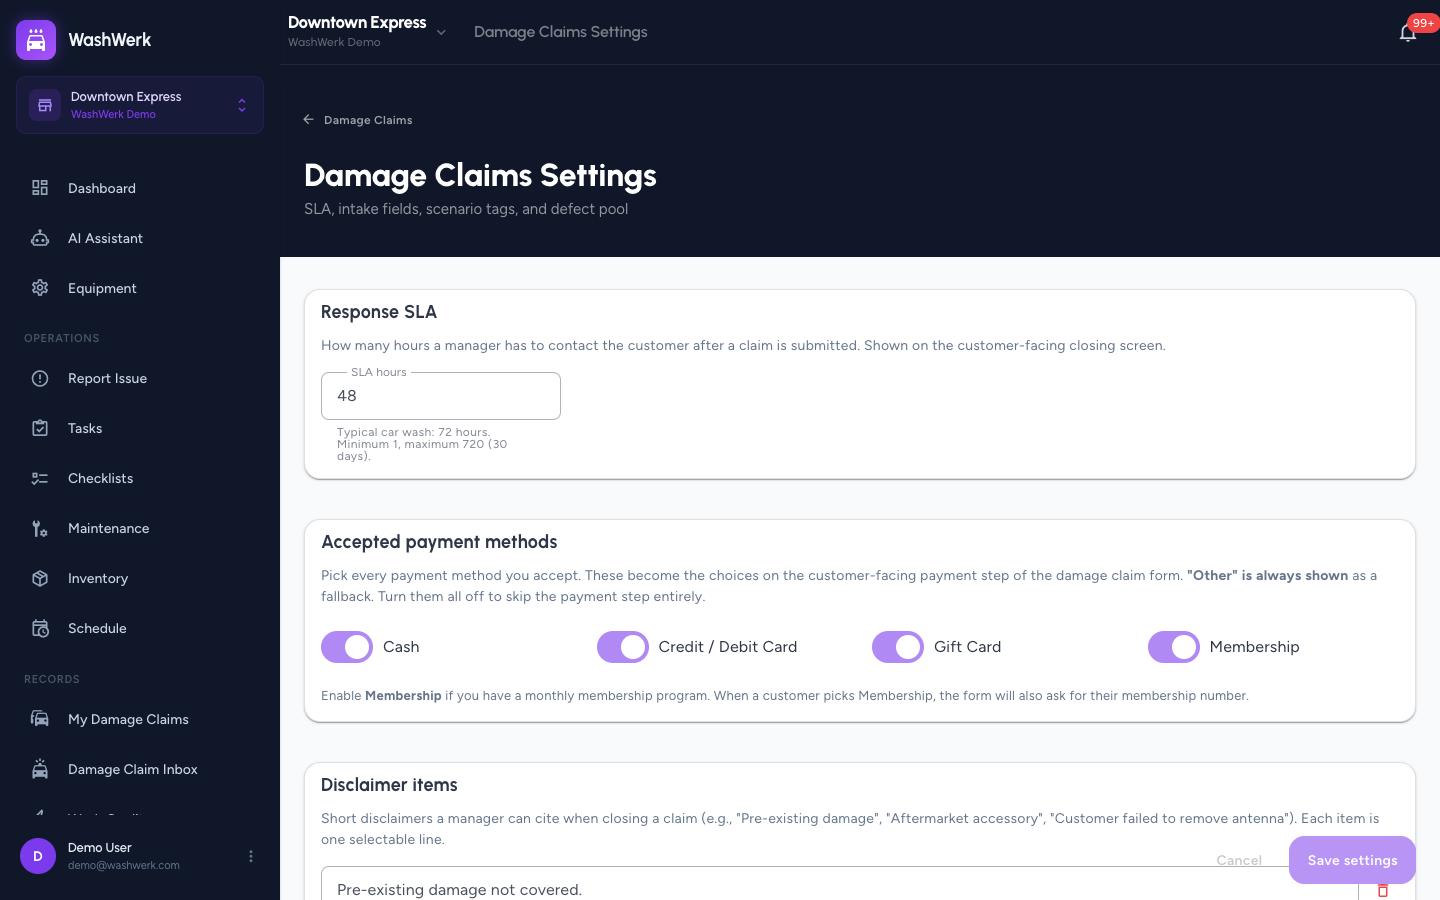
- These become the choices on the intake form's payment step (Other is always offered). Turn them all off to skip the payment step entirely.
Manage disclaimer items
- Under Disclaimer items, select Add disclaimer and type a short line a manager can cite when closing a claim (for example, "Pre-existing damage").
- Edit any line in place, or select the trash icon to remove it.
Manage scenario tags
Scenario tags are root-cause labels a manager picks when closing a claim; they power analytics like top damage causes.
- Under Scenario tags, type a label in New tag label and select Add.
- Edit a tag's label in place — it saves when you move off the field.
- Use the archive icon to retire a tag (or unarchive it), or the trash icon to delete it. Past claims keep the label they were closed with.
Save your changes
- Select Save settings to persist the SLA, payment methods, and disclaimers. Scenario tags save as you add, edit, or archive them — they are not part of the Save settings button.
Copy settings to other stores
- Under Copy settings to other stores, select Copy to stores….
- Select each destination store and confirm. This copies the SLA, payment methods, and disclaimer items only — scenario tags and defect-pool participation are not copied, as each store manages those independently.
Expected result
A confirmation appears after you save, and the new SLA and payment options take effect on the next claim submitted at your store. Copying shows a confirmation naming how many stores received the settings.
Troubleshooting
- If the "Copy to stores" card isn't shown: your company has only one store. The option appears once you have a second location.
- If a disclaimer doesn't appear when closing a claim: save the settings first — blank lines are dropped, and only saved disclaimers populate the close screen's picker.
- If a deleted scenario tag still shows on old claims: that's by design — past claims keep a snapshot of the label they were closed with.