
How to review inventory count history and discrepancies
Open your store's past counts and inspect each one's discrepancies so you can reconcile stock and spot shrinkage. This guide is for store managers, shift leads, maintenance managers, and owners.
Before you start
- Where: Store-level — Inventory Reports screen
- Permission: View Inventory
- Available by default to: Owners, Store Managers, and Shift Leads. (On custom roles, this needs the permission named above.)
- You must have: At least one count run at your store. To run one, see How to run an inventory count.
View count history
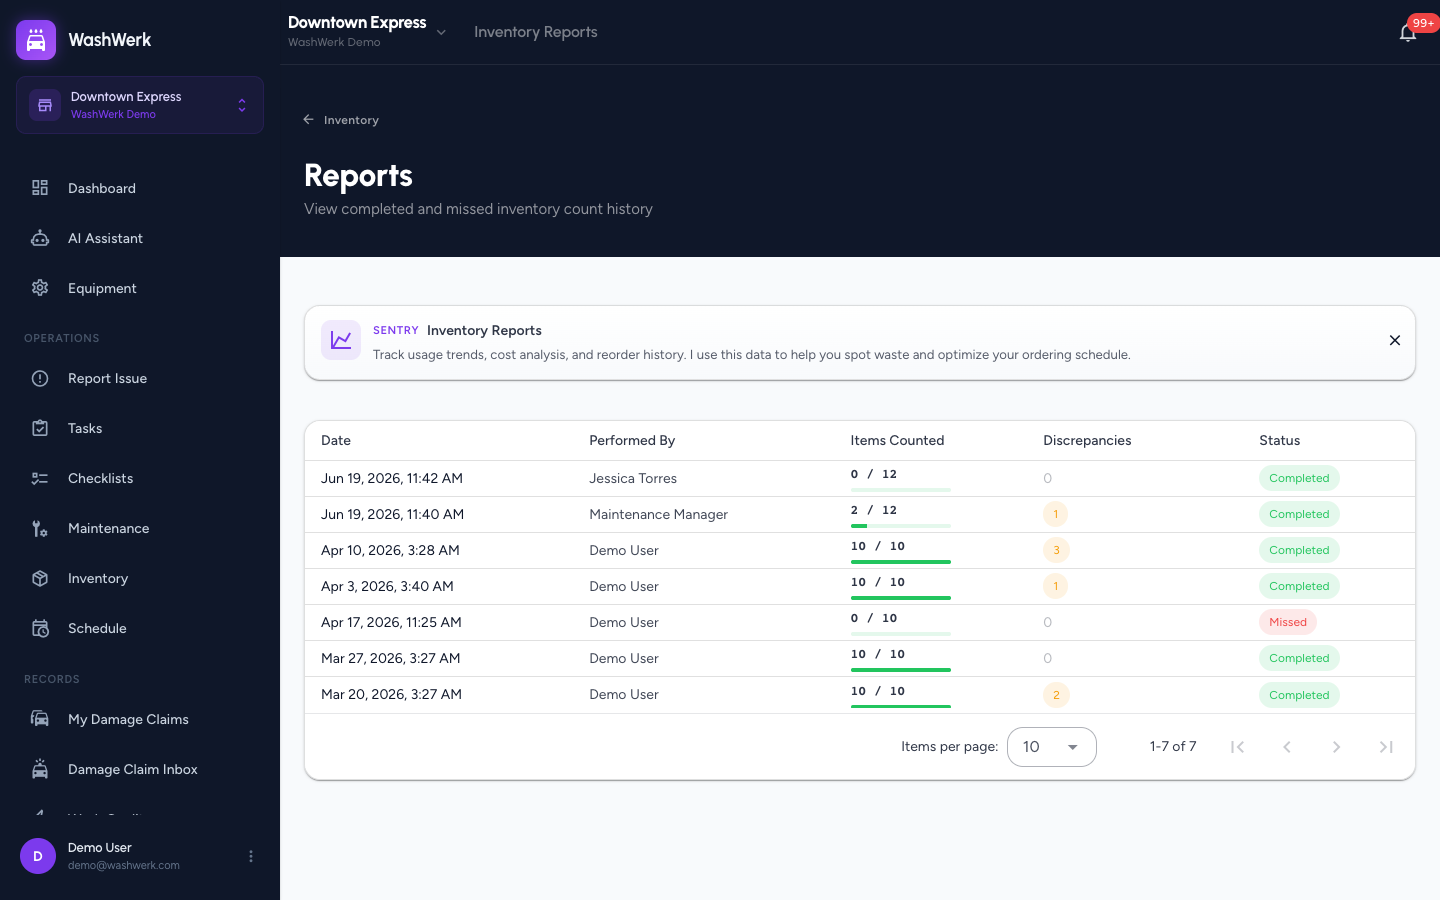
- Open Inventory in the sidebar, then select Reports. The count history table opens.
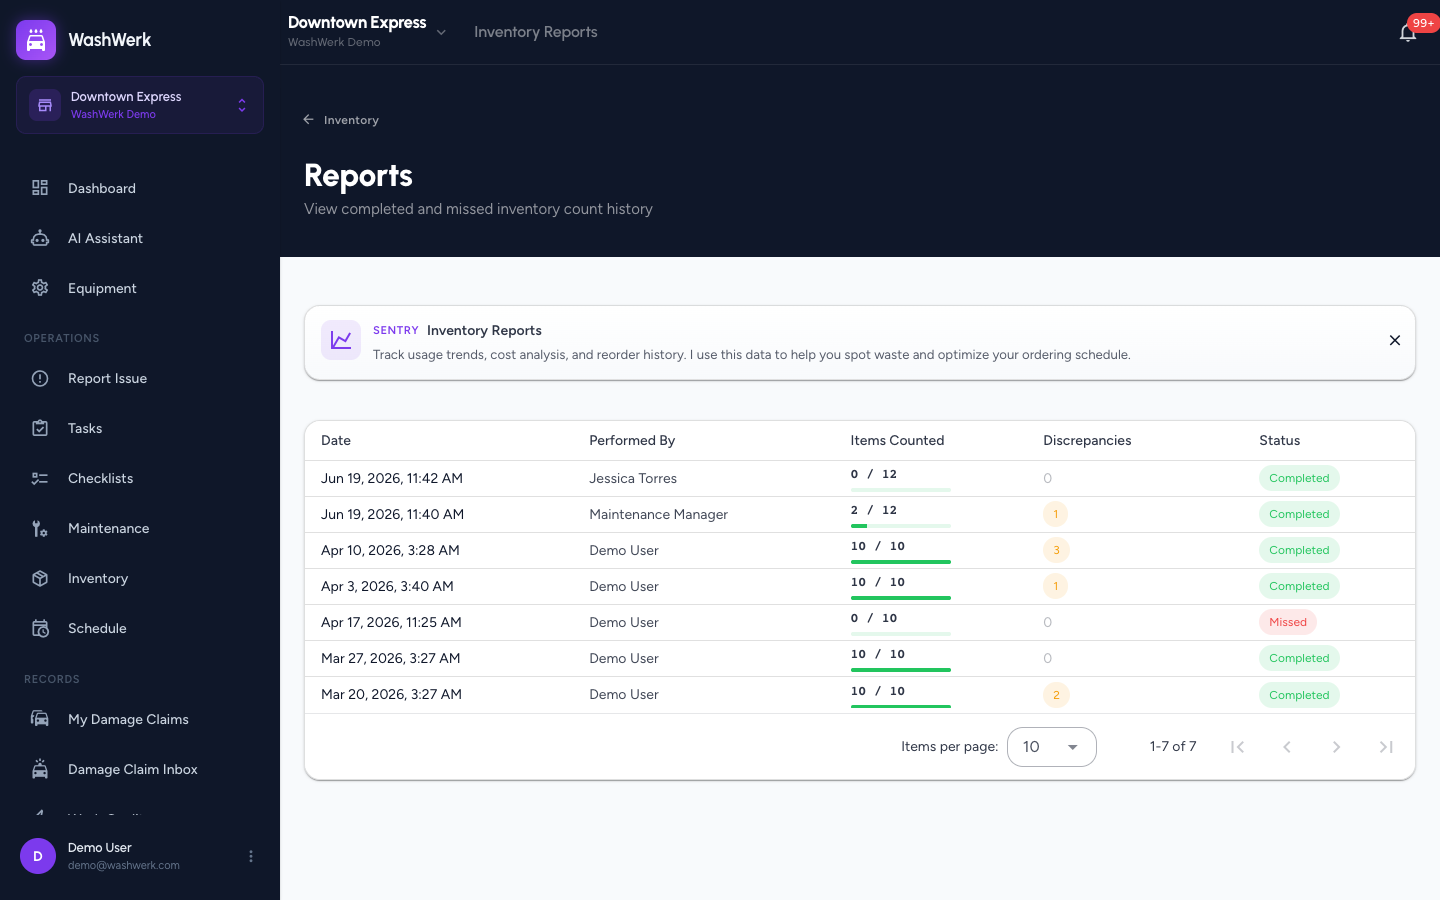
- Scan the table to see each count's date, who performed it, progress (counted of total), discrepancy count, and status (Completed or Missed). A Missed status means the count wasn't completed before the next scheduled interval.
Inspect a count's discrepancies
- Select a row in the history table. The Count Details dialog opens.
- Review the summary stats: Counted, Skipped, and Discrepancies.
- Under Discrepancies, check each flagged item's expected vs. actual quantity and the difference — a negative difference points to missing stock or shrinkage.
- Read any Notes the counter left, and use the All Items table to see every line's expected, counted, diff, and status.
Expected result
You can see, for any past count, exactly which items differed from expectation and by how much, letting you investigate shrinkage or correct future par levels.
Troubleshooting
- If the history is empty: No counts have been completed at this store yet. Run one from the inventory count screen.
- If a count shows as Missed: It was started or scheduled but never submitted before the next interval. Start a fresh count to get current figures.
- If discrepancies look wrong: The expected quantity reflects on-hand stock at the moment the count started. Record any deliveries or usage as transactions before the next count so expected levels stay accurate.